Exhibitor Setup Checklist:
1) Create/Add a form to collect the Initial Exhibitor Request
2) Make the form available for the public to submit requests.
3) Review the Request form
4) Create an Exhibitor account
5) Open Exhibitor Meeting times
Step 1: Create/Add a form to collect the Initial Exhibitor Request
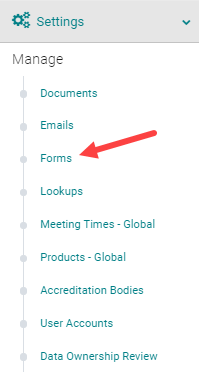
Go to Settings > Forms
Click 'Add New Form'

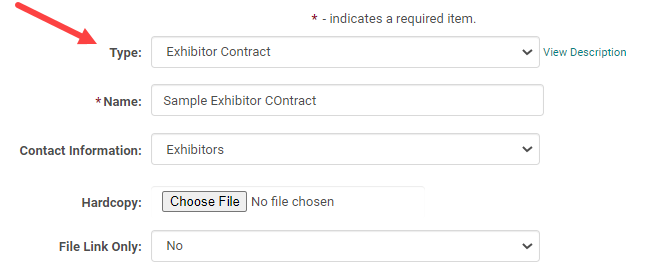
Select the form type as 'Exhibitor Contract'. Add all the required questions to the form and save it.
Note: Other Exhibitor forms if any can be added under the form type "Exhibitor". These will show under the Exhibitor ready room when the deadlines are opened.
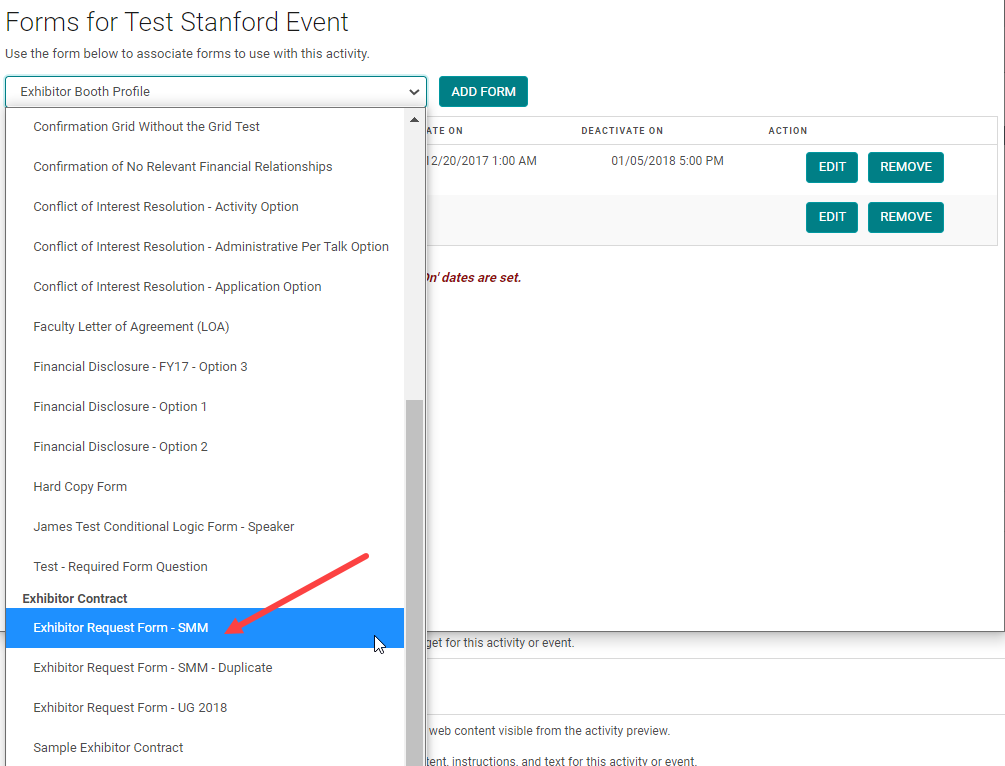
Step 2: Make the Request form available to the public
- Go to Manage Forms of the Activity
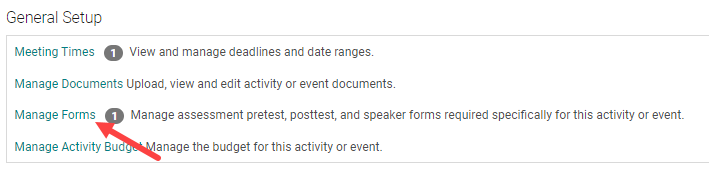
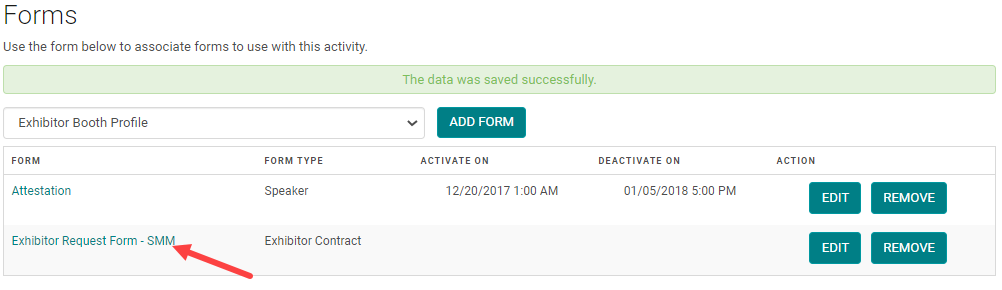
- Under 'Exhibitor Contract' are the initial exhibitor request forms that you created. Select the form and click 'Add Form'
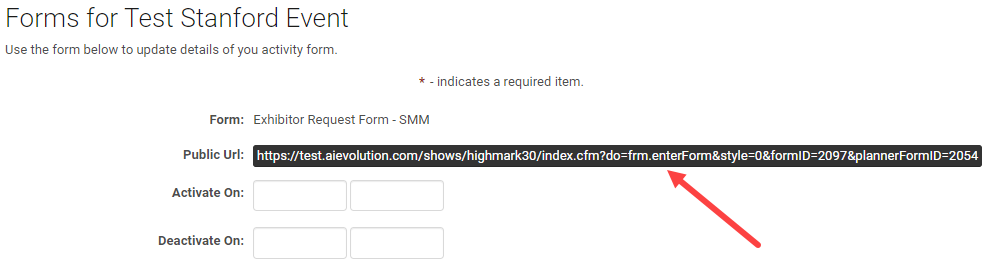
- Once the form is added click on the title of the form
Copy the form accessibility URL
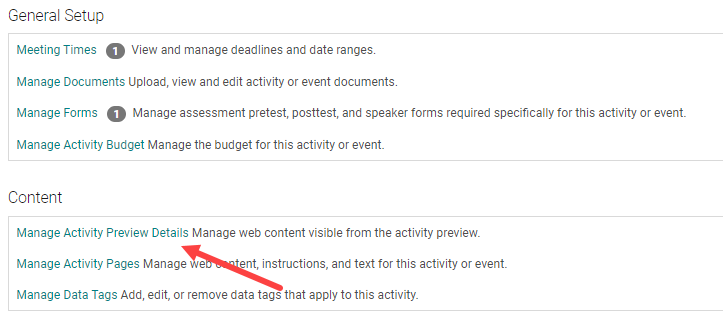
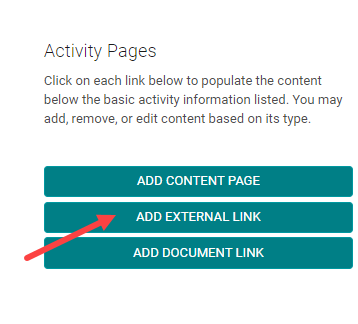
- Go to 'Manage Activity Preview Details'
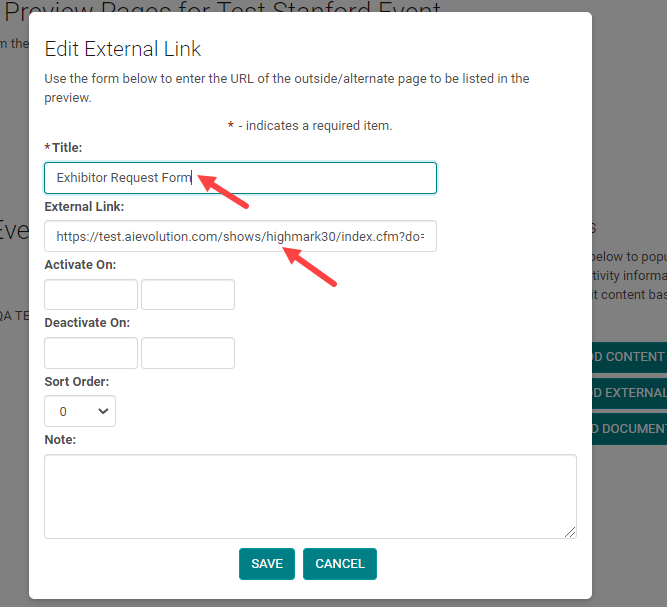
- Click on 'Add External Link'
- Paste the URL in the 'External link' field.
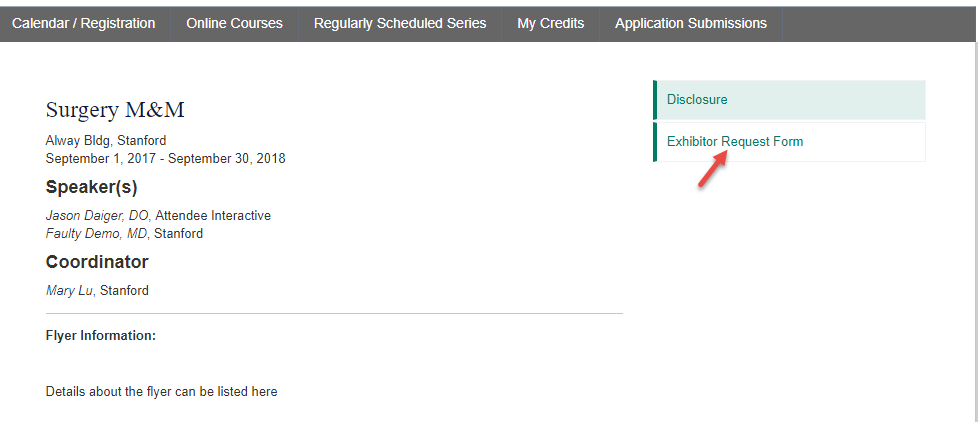
When the Exhibitors access the Activity, they should be able to click on the link and complete the request form and submit it.
Note: You could also email the request link to prospective Exhibitors Go to Settings > Forms > Exhibitor Contact. Open the form and copy the URL of the form and paste it on the body of the email. Then strip of "&style=1&editing=true" from the URL.
Step 3: Review the Exhibitor Request Form
Go to Reports > Run Report > Forms > Responses and select the below filters
Form - select the Exhibitor request form you created in the first step
Other > Activity _ Select the desired Activity
Review the results.
Step 4: Create an Exhibitor Account
Once the Exhibitor Request is approved, create an account for the Exhibitor.
Pre-select the activity for which you want to add the Exhibitors.
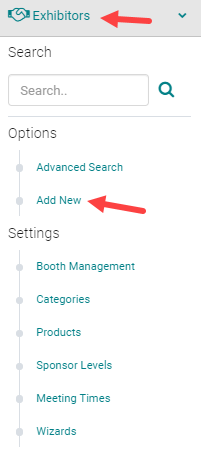
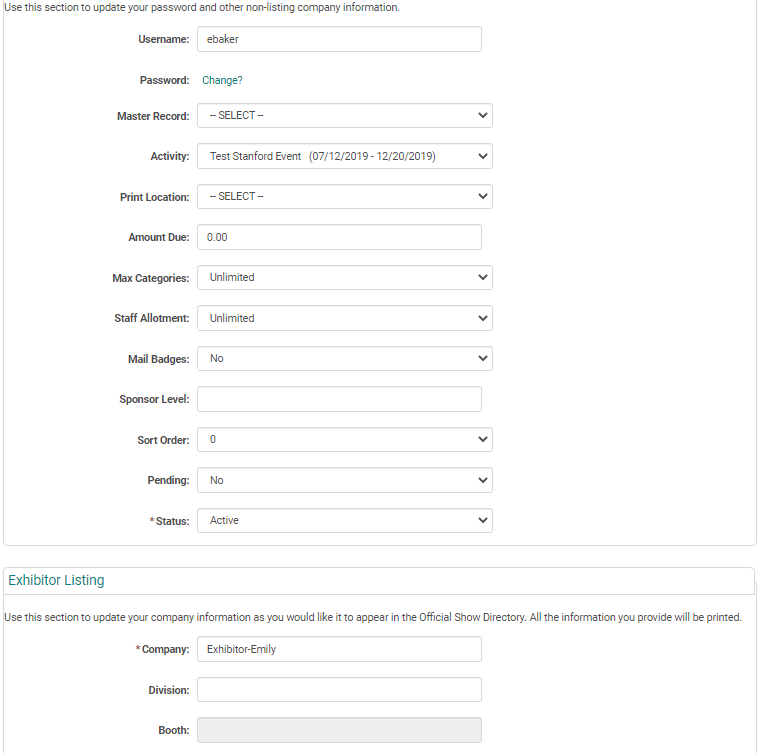
Go to Exhibitors > Add New
NOTE: You do not need to enter a Username and Password, the system will automatically generate one when you save the new record.
Complete the Exhibitor Listing and Contact Information details
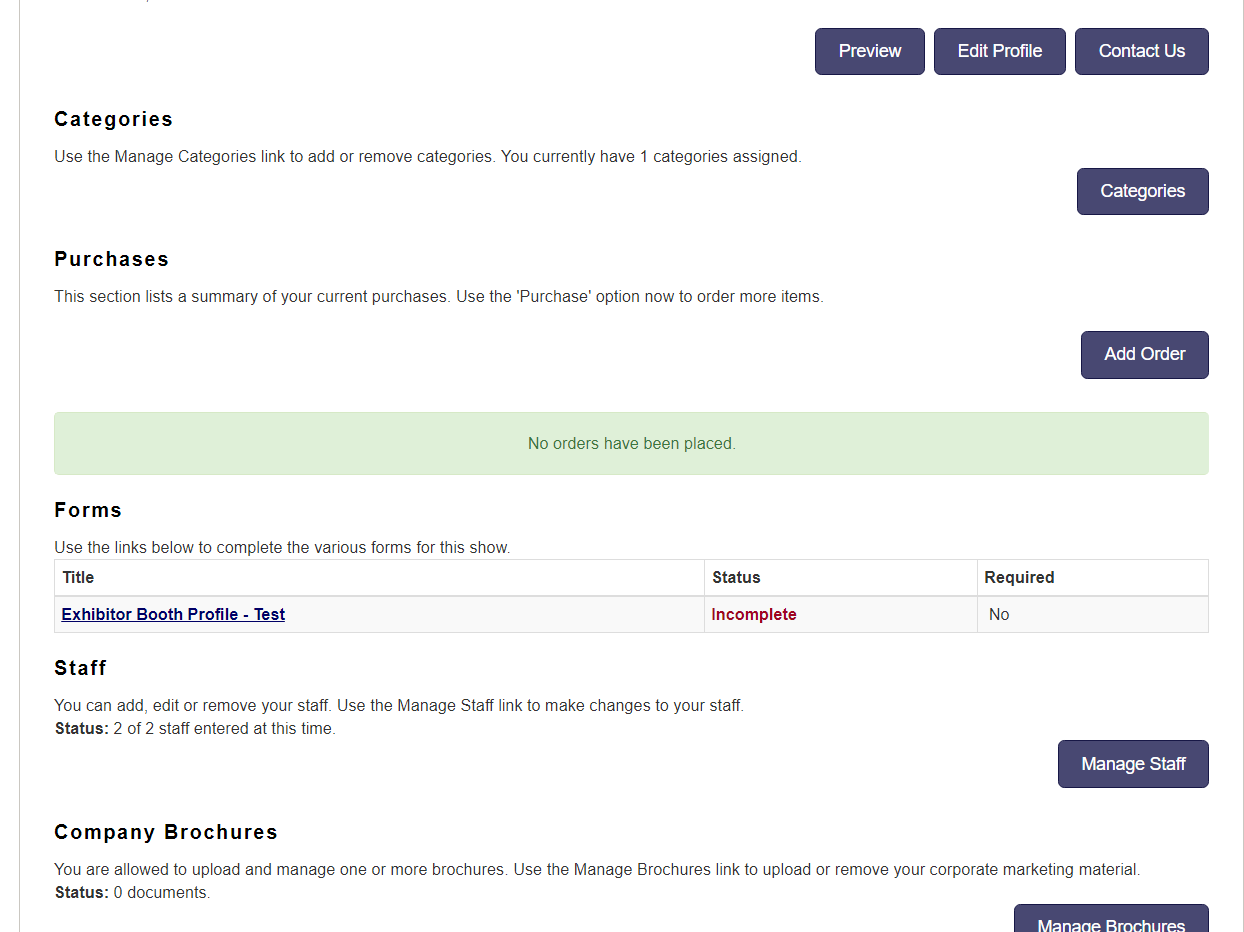
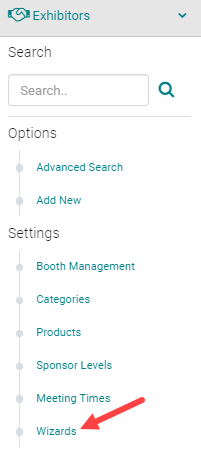
Optional Step: Exhibitor Categories and Wizards
You can add Categories and Wizards for the Exhibitors. Exhibitors when they log in to their ready room, can add categories that define their booth. Eg: Technology, Innovation, Infrastructure etc.
Wizards are the action steps that require the Exhibitor to complete as soon as they log in. Eg: 'Password reset' could be a first wizard step and 'Edit Profile' could be added as a second step.
Step 5: Open the Exhibitor Meeting times
Exhibitor meeting times set the deadlines for Exhibitor Ready Room. Once the Exhibitor Ready Room is open Exhibitors will be able to complete the required forms, upload Exhibit Content and marketing material, purchase products etc.