Add a product subtype under two different situations –
1) When you have more than one session in an Activity. In the screenshot below you can see there are four sessions happening on a single day. As per the setup attendees register for the Activity and choose one of the Additional sessions.

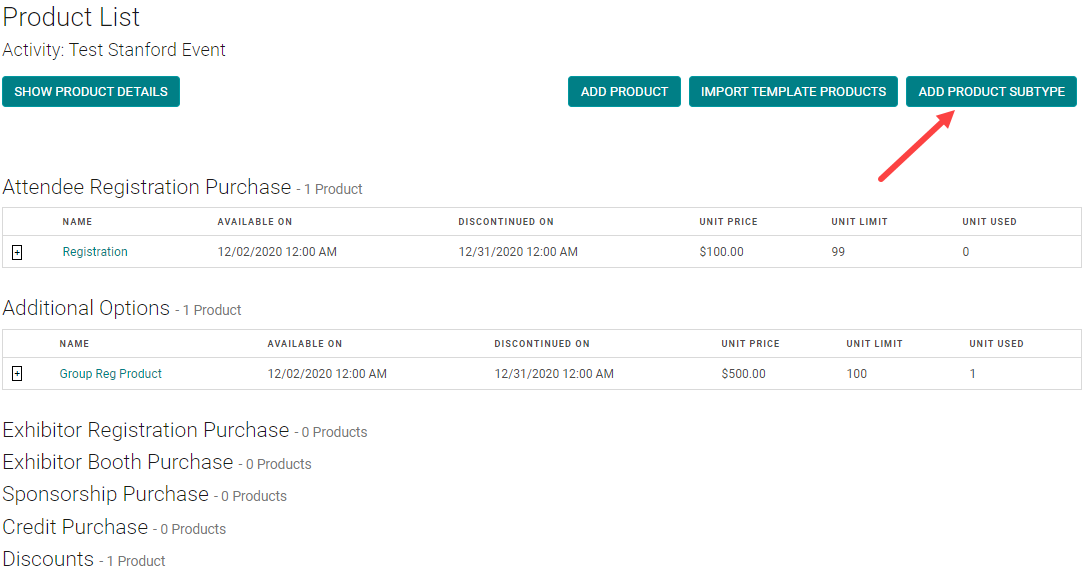
2) Another situation where you can add a product subtype is to categorize your products into different groups. E.g. You can create a product Sub type called ‘Nurse Products’ to which you add all your Nurse Registration type products and subtype called ‘Physician Products’ and group all your Physician registration products under it. The screenshot below shows how your product listing looks like.

From the front end if the attendee selects the Physician registration type, he/she will get to choose the Physician products add for his registration type. Observe the screenshot above. There are 2 Physician Products , but there is only one product showing up in the screen below. That is because of the dates. We made the Second product to be available only on a certain date.


Now, how to add a Product Sub type to get the above results. Click on ‘Add Product Sub type’
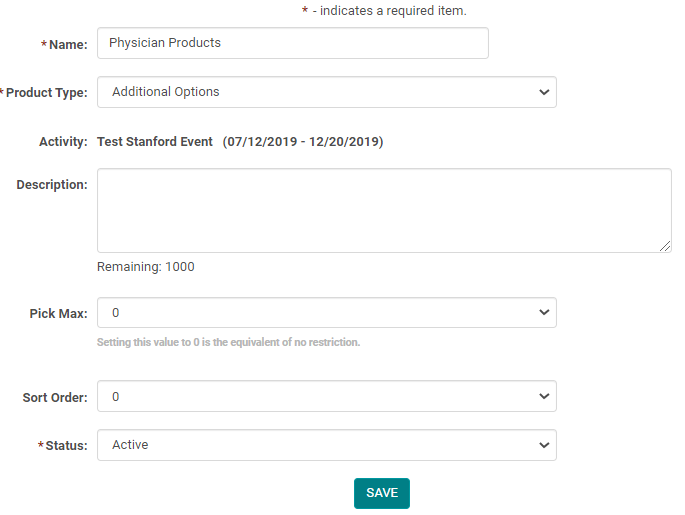
Give a name to the product sub type
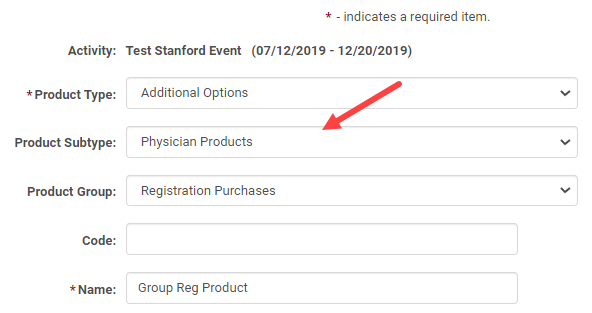
Select the main product type under which you are adding a sub type. Note: Currently you are allowed to add Product Sub type only for the product Type= Additional Options.
Pick Max = 0 means an attendee can choose any or all the available products or sessions (when you have more than one). Also Pick Max = 0 when you are controlling the products availability by dates.
Pick Max =1 means the attendee is allowed to choose only one of the available products or sessions (when you have more than one session). Use Pick Max= 1 when you have more than one session or a product available on the same date/time and you only want the attendee to choose 1 from the given options.
Once you have created a product sub type, select the product that you want to add to this sub type

Choose the Product Sub type